Online ESRI ArcGIS (WFS Instruction)
If you use the online versions of ESRI ArcGIS, follow the instructions below to include our WFS interface for working with station data. Start by opening Online ESRI ArcGIS and logging in:

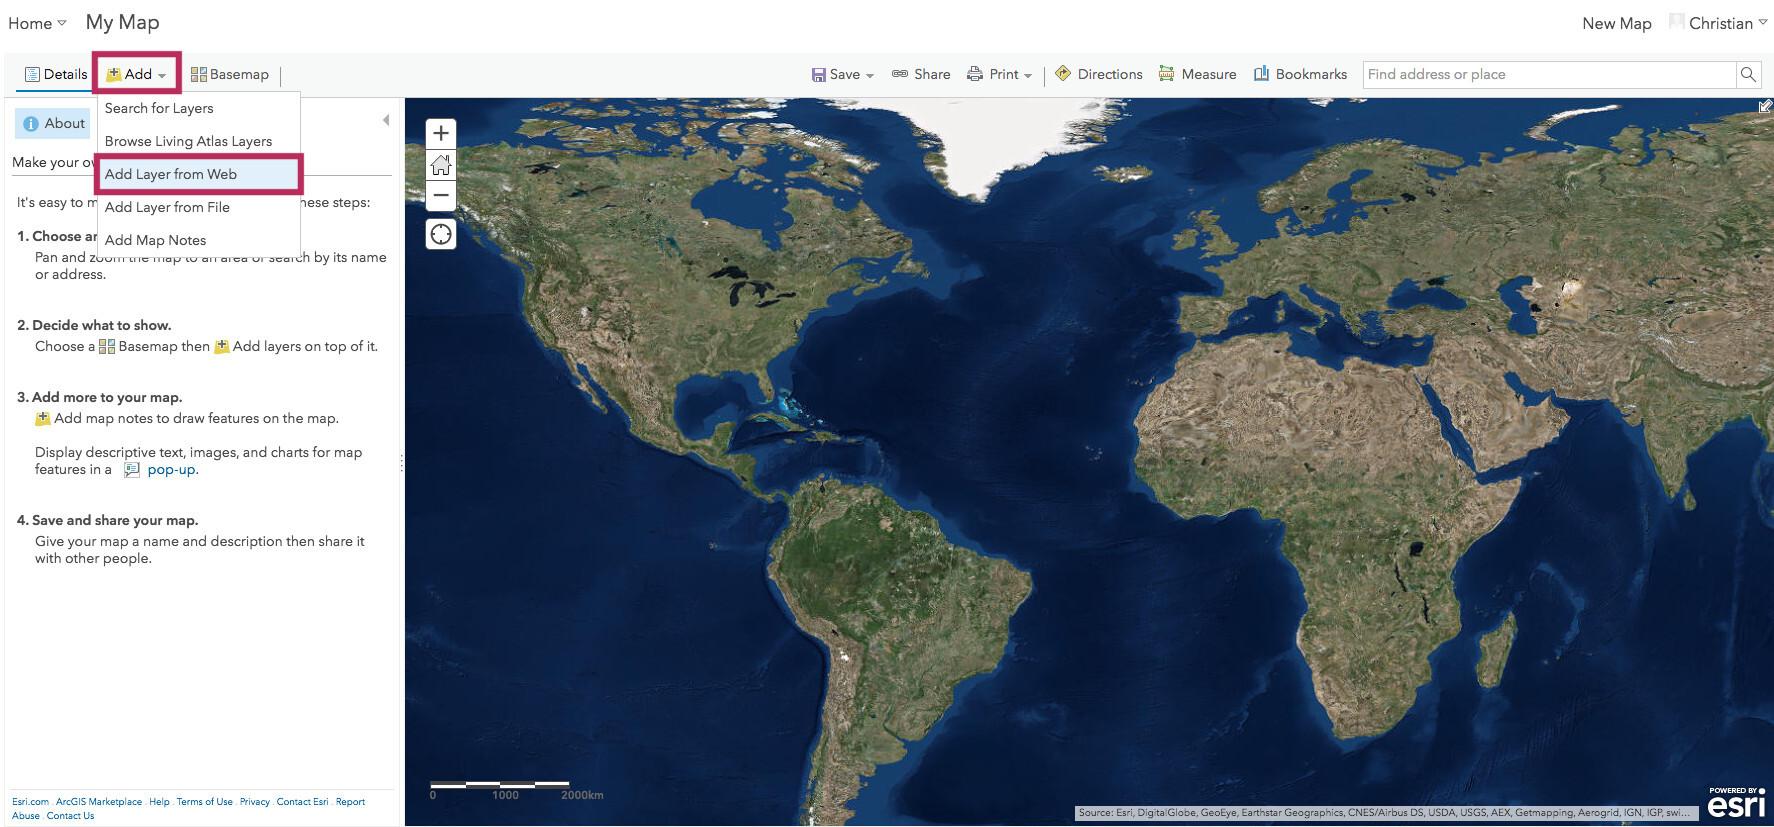
You can add a layer by clicking on the Add button and then selecting Add Layer from Web from the drop down menu:

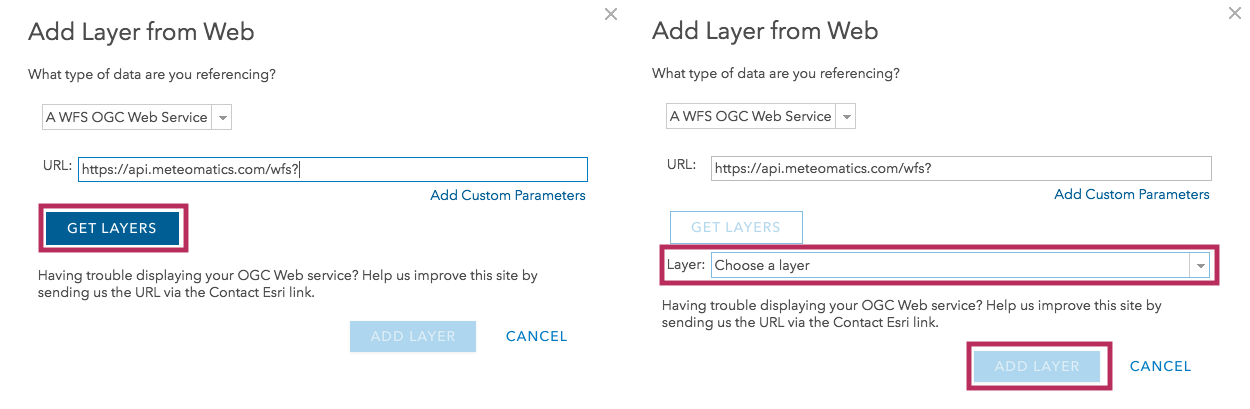
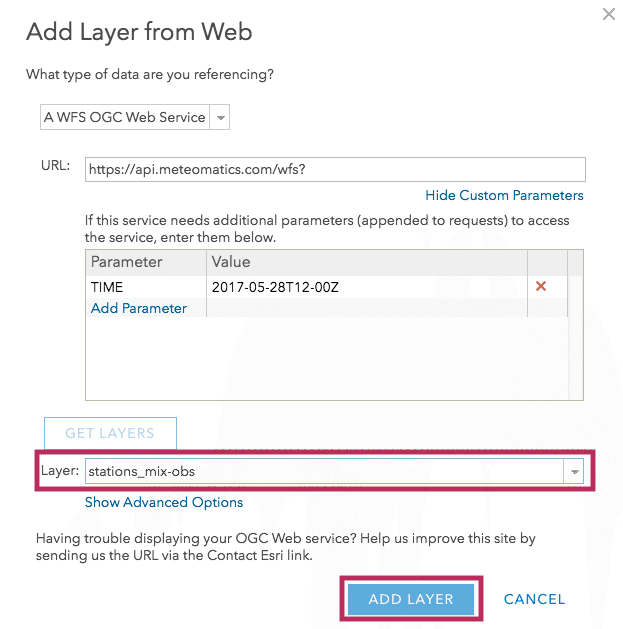
Pick the data type A WFS OGC Web Service and enter our WFS URL https://api.meteomatics.com/wfs?. After clicking on the get layers button, which asks you to enter your Meteomatics API account credentials, you will be able to select a layer and add it with add layer.

Please note that this queries only a station list and therefore the data content is some general information about the stations, for example name and elevation. If you wish to query weather data, please follow the following instructions.
Querying data with custom parameters
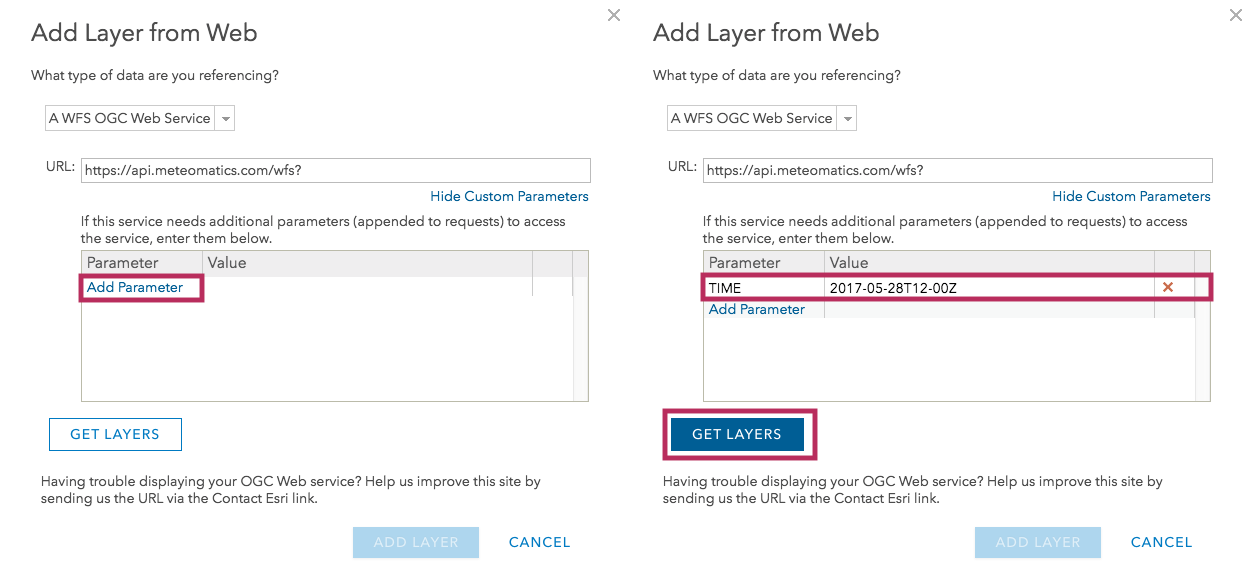
In order to make full use of our WFS interface, you will need to be able to add custom parameters to the query, so let us demonstrate this by going over the steps that are required to query a WFS feature type for a specific TIME. The other custom parameters described above can then be used in the exact same manner.
When adding the layer, you can directly add custom parameters with Add Custom Parameters:


If you have already added the layer, you can change it by going to the layer options and making use of WFS OGC Options.
Choose add parameter and enter the desired parameter, which is TIME in this example, and the time you're interested in.

As before click on get layers, pick the feature of interest and click on add layer:

An example WFS query to map stations_mix-obs stations results in the following view:

