QGIS (WFS Instruction)
If you use the free and open source geographic information system QGIS you can follow the instructions below to add our WFS interface to access our WFS.
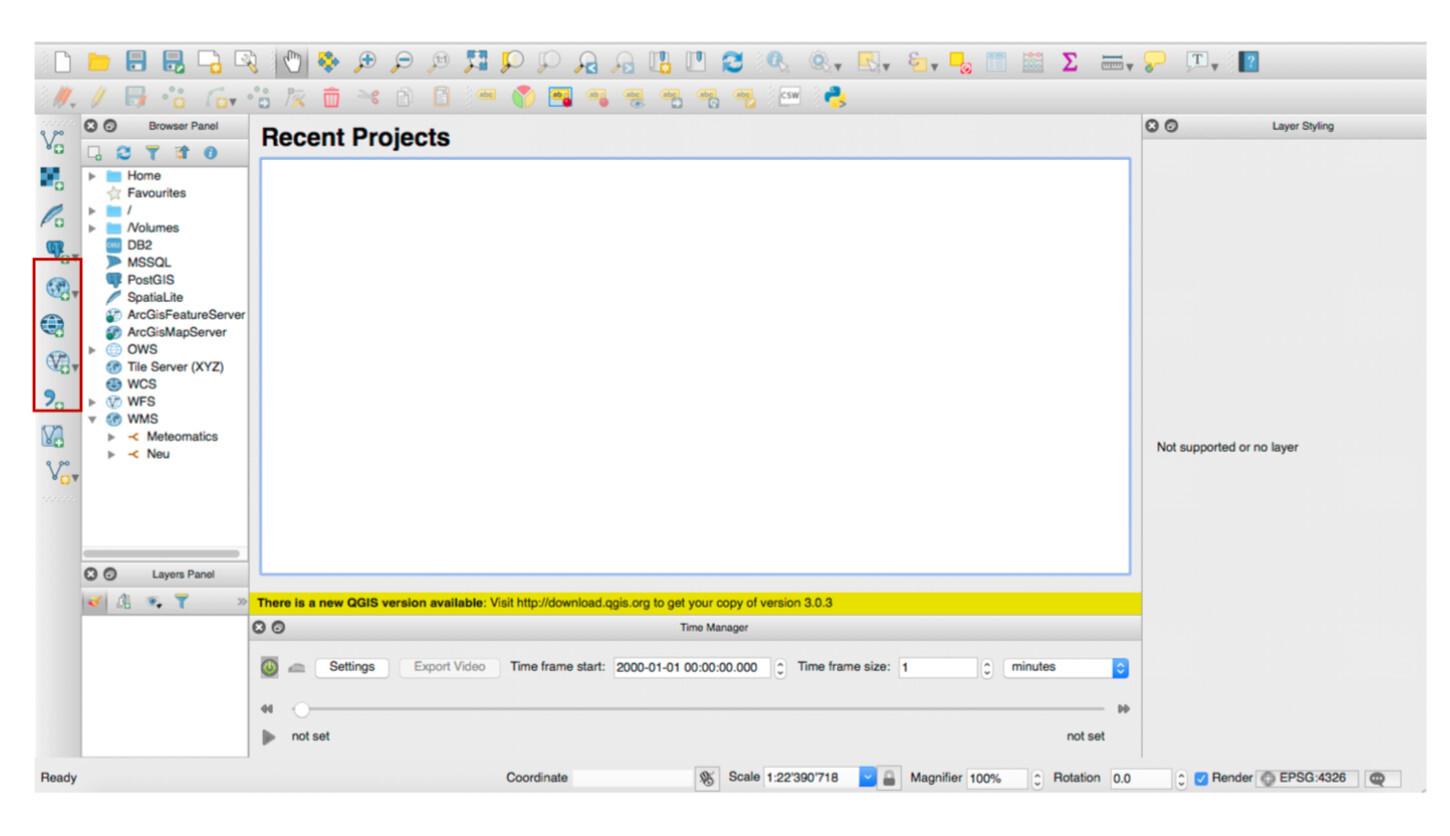
Start by opening QGIS and add a WFS-Layer as depicted below:

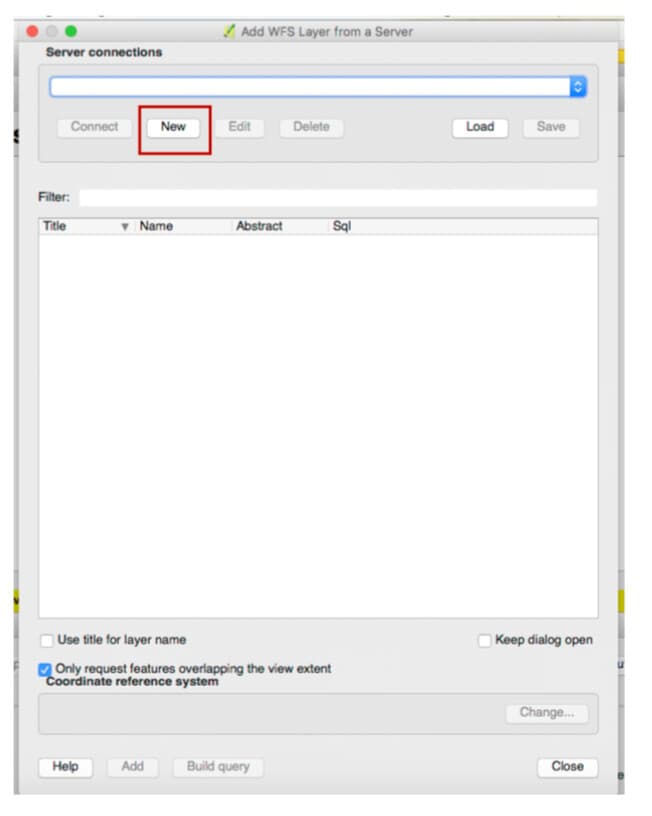
Connect with the Meteomatics WFS Server by creating a New server connection

Fill in the name of Name of the service, for example with Meteomatics WFS, as well as our WFS URL http://api.meteomatics.com/wfs. Enter your username and password for your Meteomatics API account.

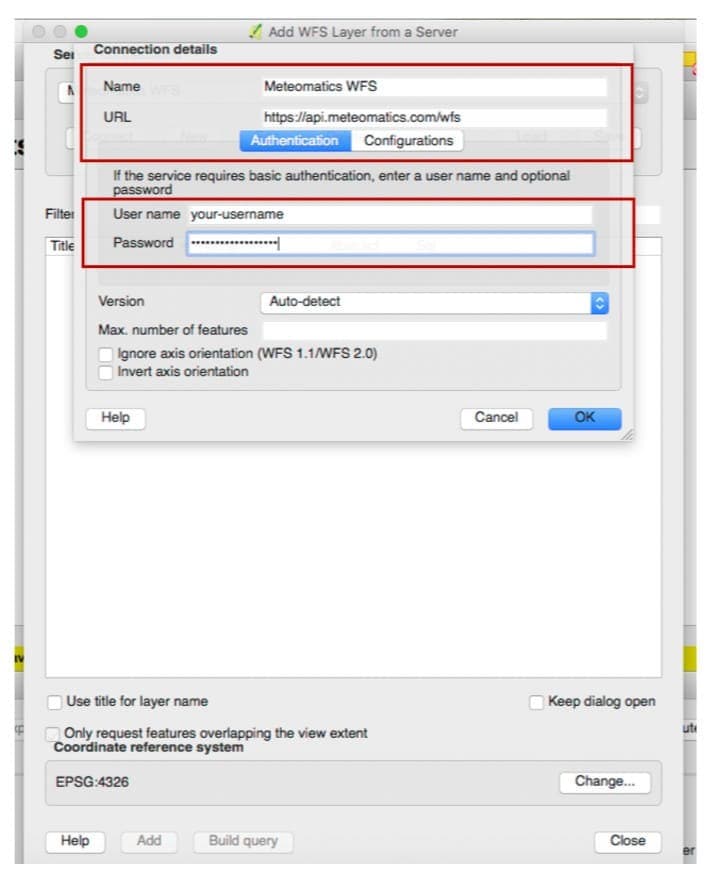
Note: To get the data for desired parameters, use WFS URL.
For example, in case the t_2m:C is needed, https://api.meteomatics.com/wfs?PARAMETERS=t_2m_C should be used.
For more details about the form of the URL, please visit https://www.meteomatics.com/en/api/wfs/getfeature-request/#stationdata
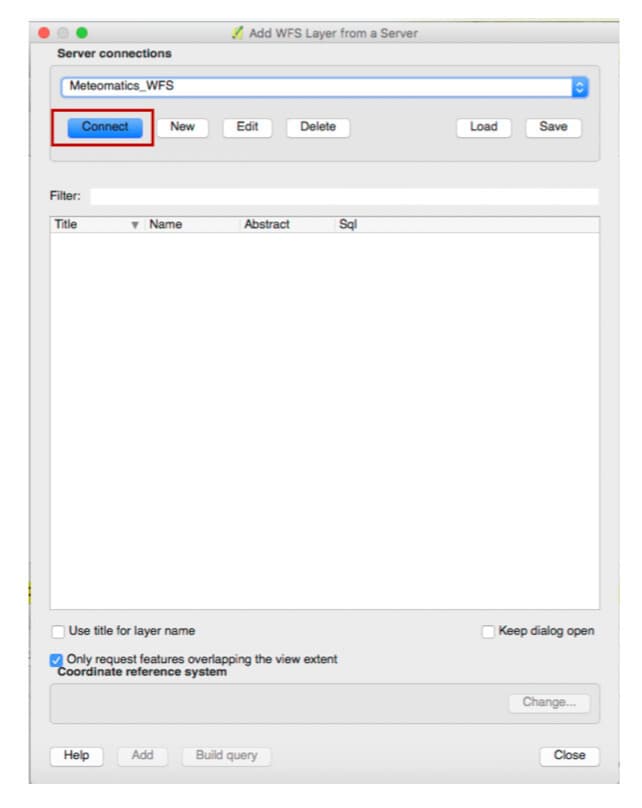
and then Connect to the Meteomatics WFS:

Afterwards you can select your desired layer and add it:

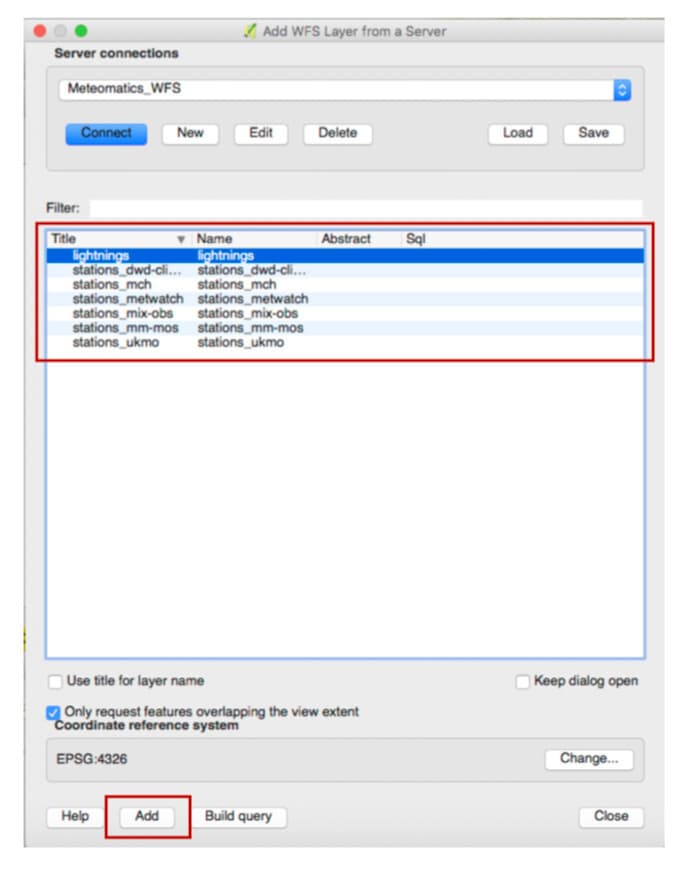
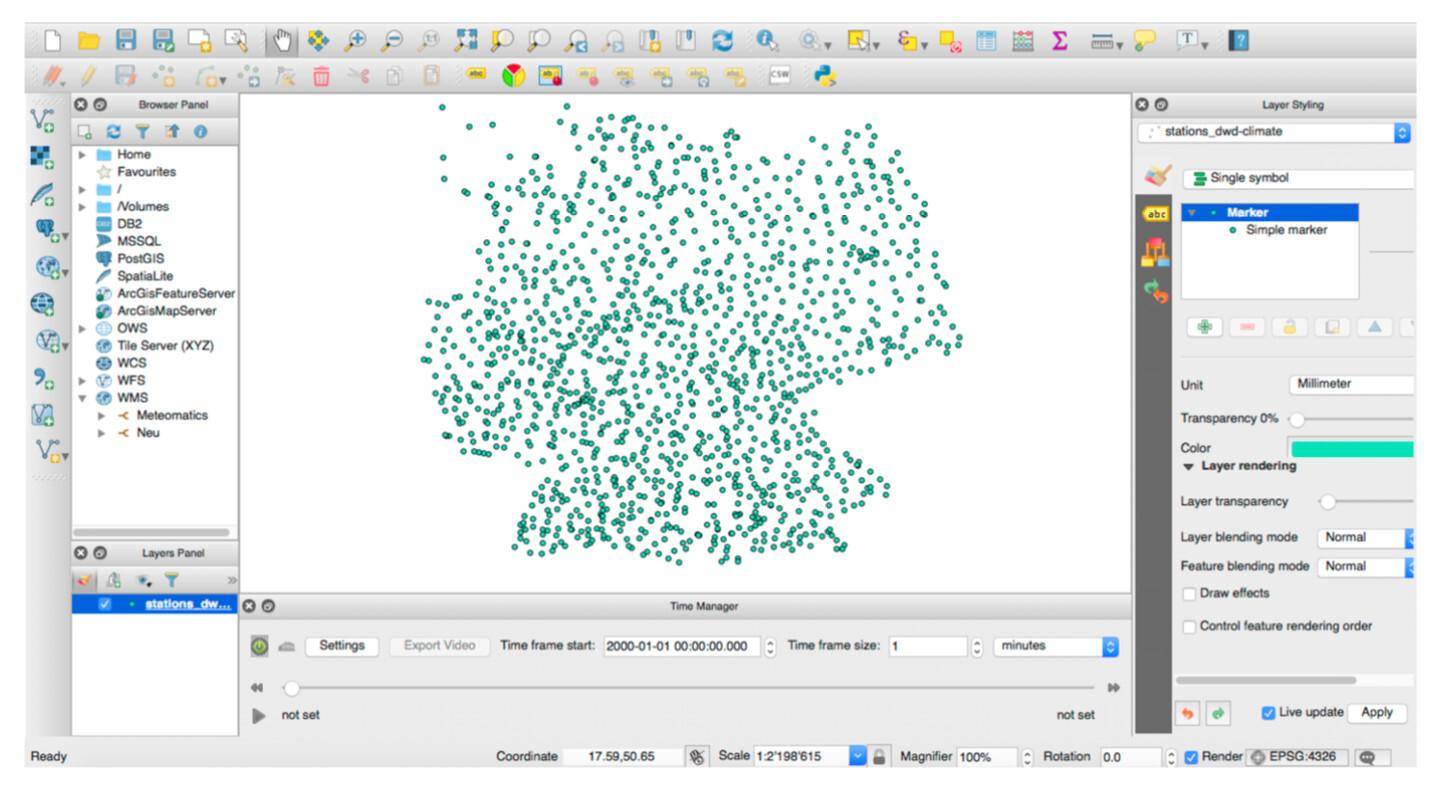
For the example of stations_dwd-climate, this results with the following display:

Note: Please note that there is currently no way to supply our custom parameters in QGIS, and therefore our WFS functionality is therefore only partially accessible.