Online ESRI ArcGIS (WMS Instruction)
If you use the online versions of ESRI ArcGIS, follow the instructions below to include our WMS interface for creating your own maps.
- Start by opening the Online ESRI ArcGIS website and logging in.
-
In order to add the secured Meteomatics services to your ArcGIS Online Subscription or your ArcGIS Enterprise Portal, you need to add the Meteomatics API as a trusted server:
In your ArcGIS Online Subscription/your ArcGIS Enterprise Portal click on Organizations → Settings → Security and under Trusted servers add the URLhttps://api.meteomatics.comto the list of trusted servers.

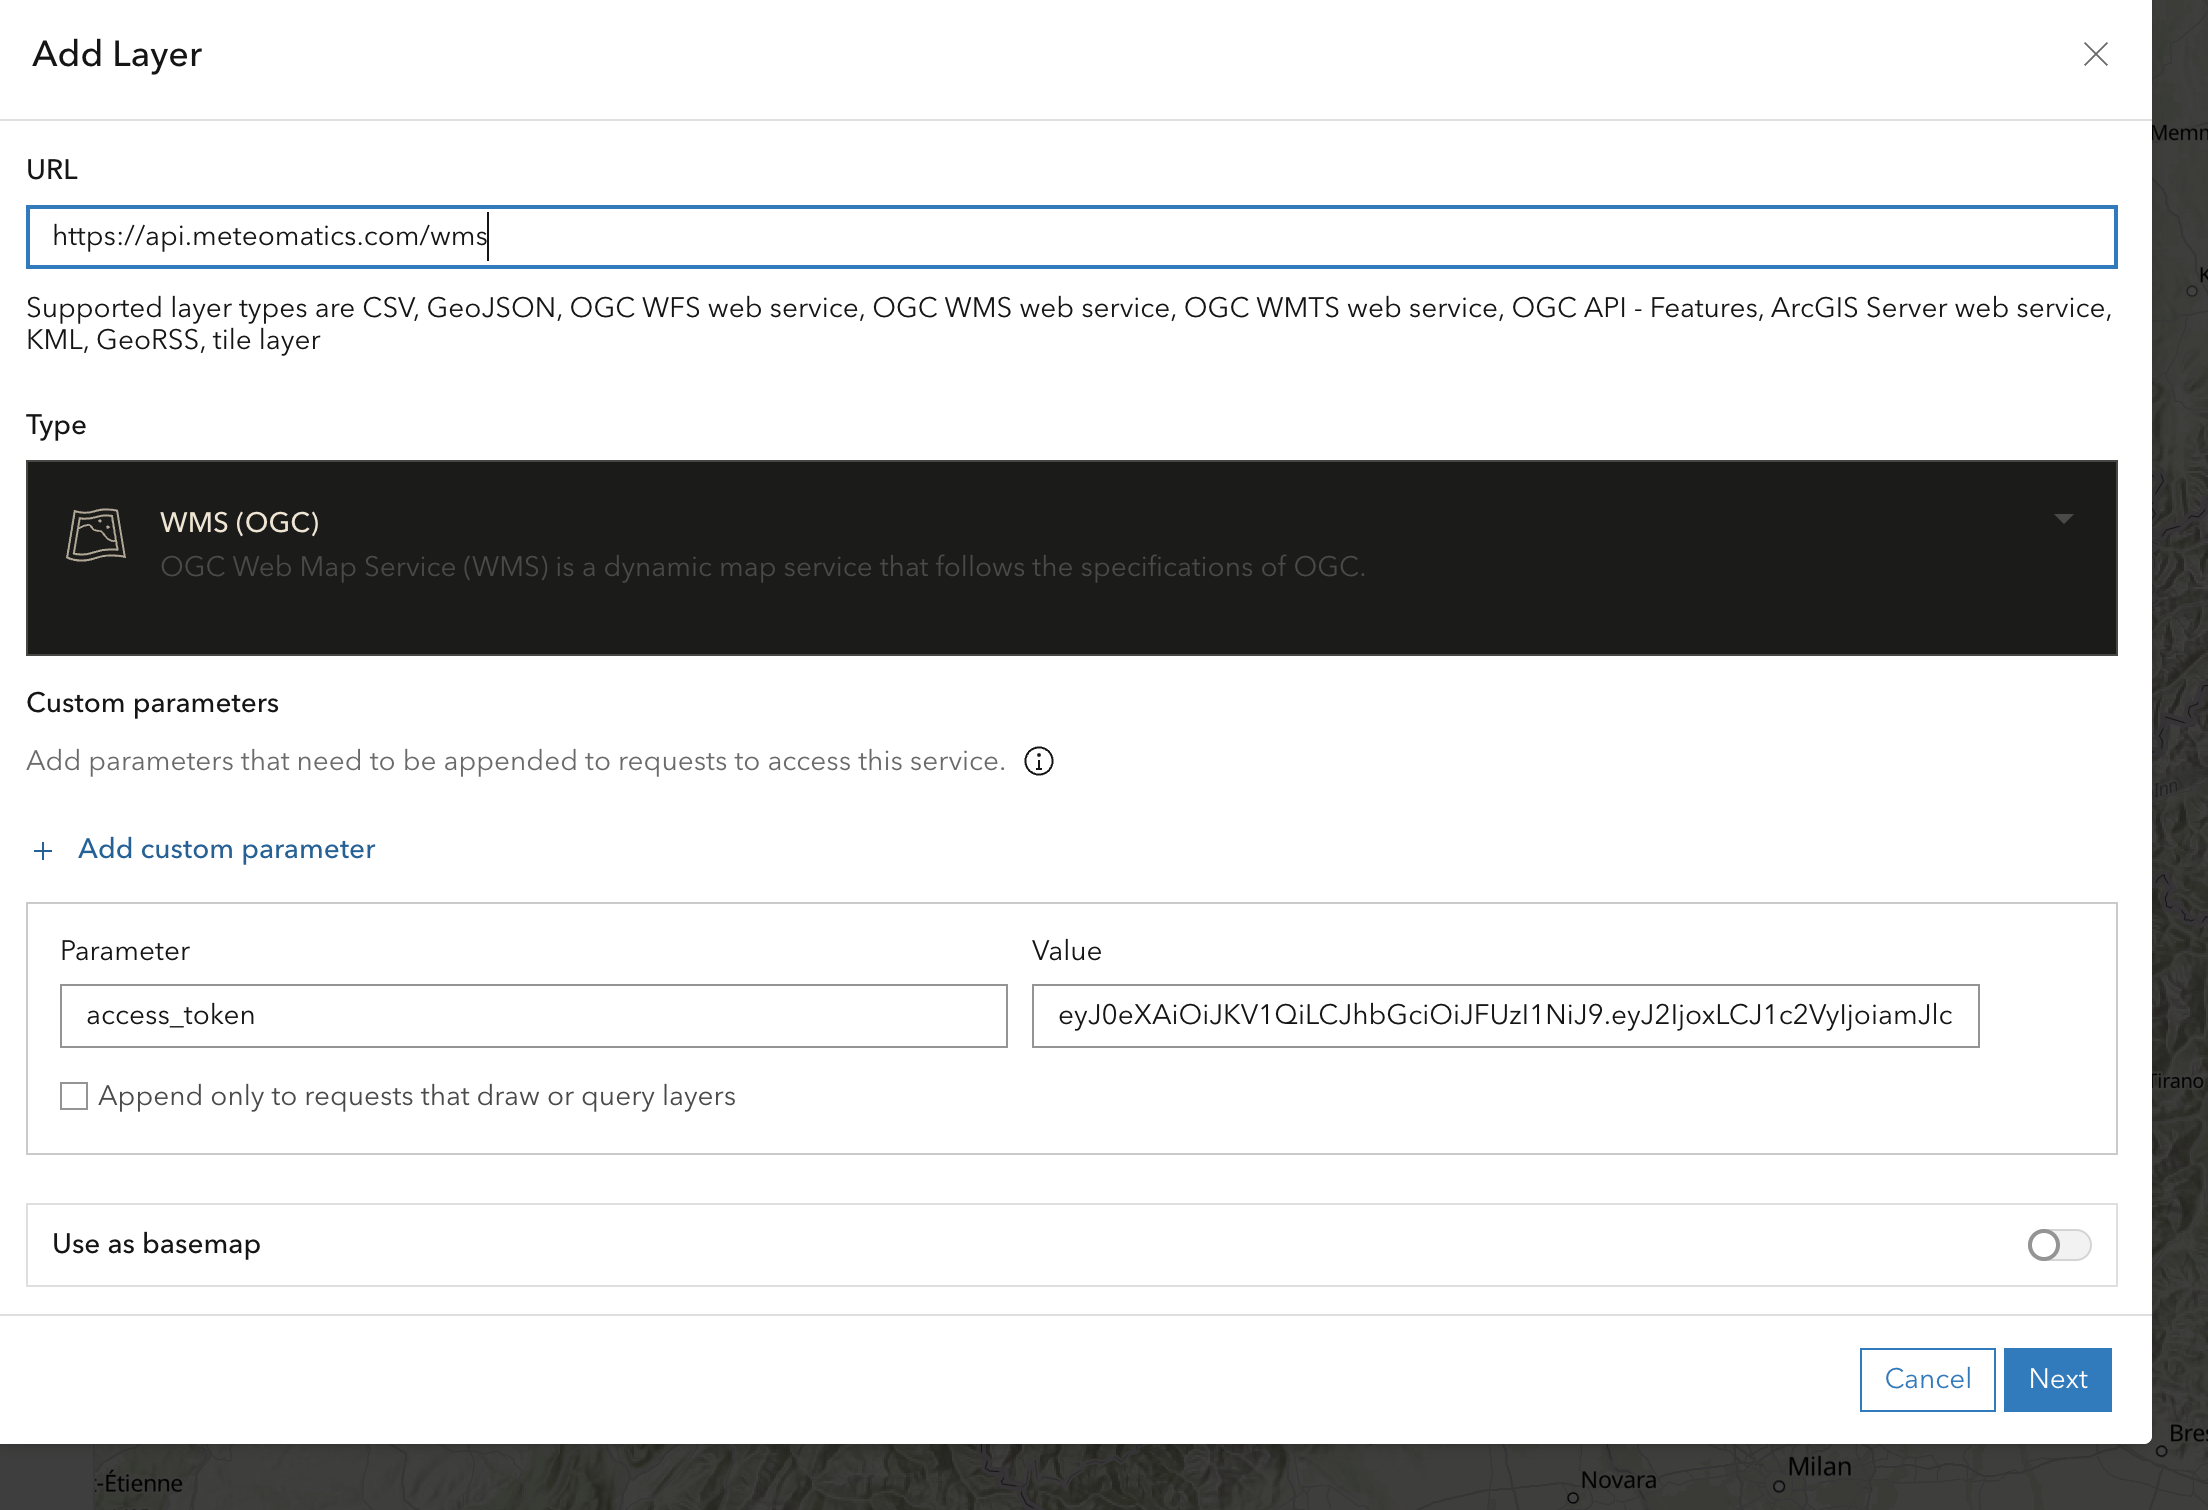
Click on Add, where you select Add Layer from Web from the drop-down menu:
There you have to enter access_token in the field Parameter and provide your access token in the field Value like shown in the screenshot below.
You can obtain your access token via https://login.meteomatics.com/api/v1/token.

Proceed by choosing A WMS OGC Web Service and enter our WMS URL https://api.meteomatics.com/wms. Click on get layers, which will ask you to enter your Meteomatics API account credentials,

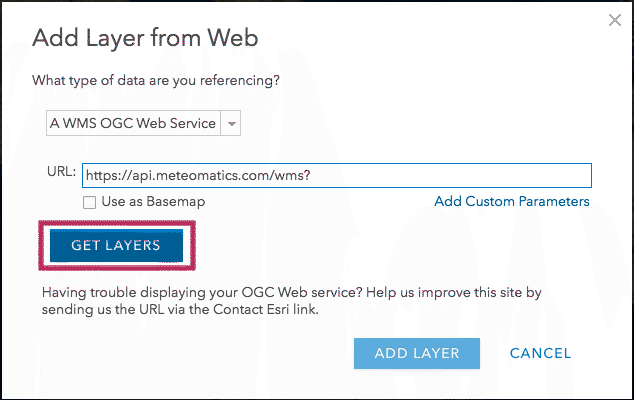
and select the desired layer (only one per time is supported). After that, press add layer


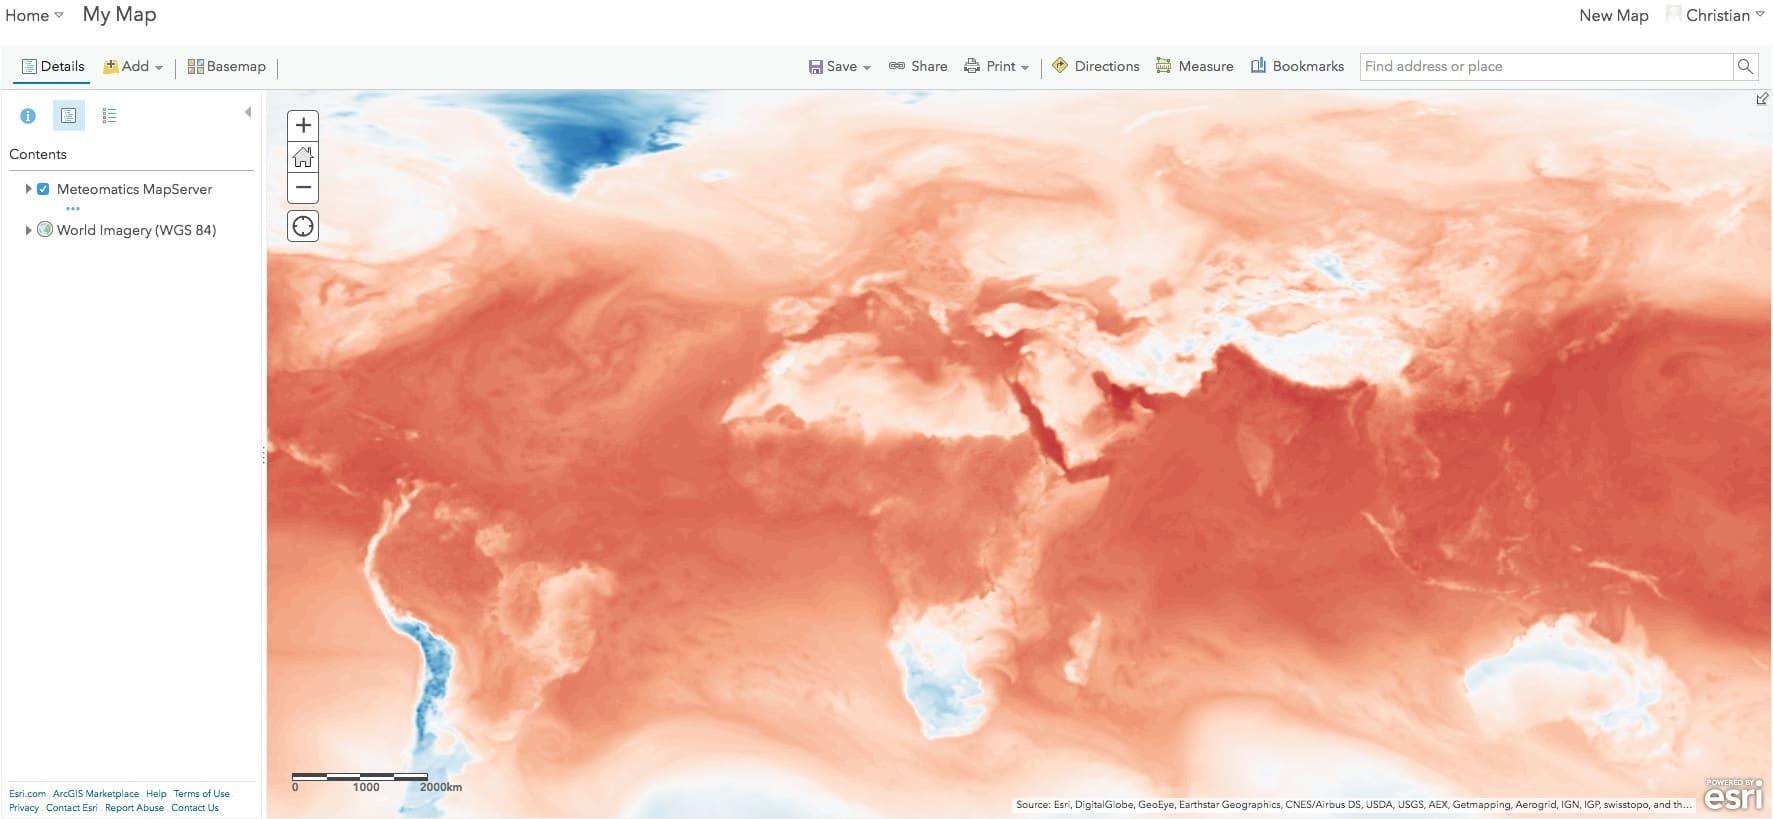
and the desired layer should be loaded and rendered.
Querying WMS Layers with custom parameters
In order to make full use of our WMS interface, say for querying WMS layers for specific times, you will need add custom parameters.
To demonstrate how this works, let us go over the necessary steps to query a WMS layer for a specific TIME. The other custom parameters can be then be used analogously.
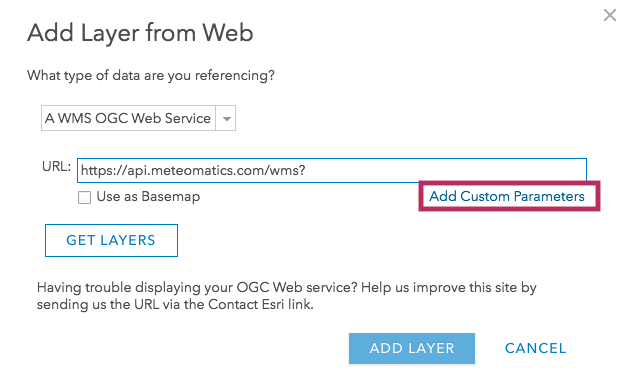
When adding the layer use Add Custom Parameters as displayed in the following image:

If you have already added the layer, you can retroactively change the custom parameters by going to the options of the layer and changing WMS OGC Options.
With the Parameter TIME you can query the layer for the date you want with Add Parameter and entering the desired Parameter and time.

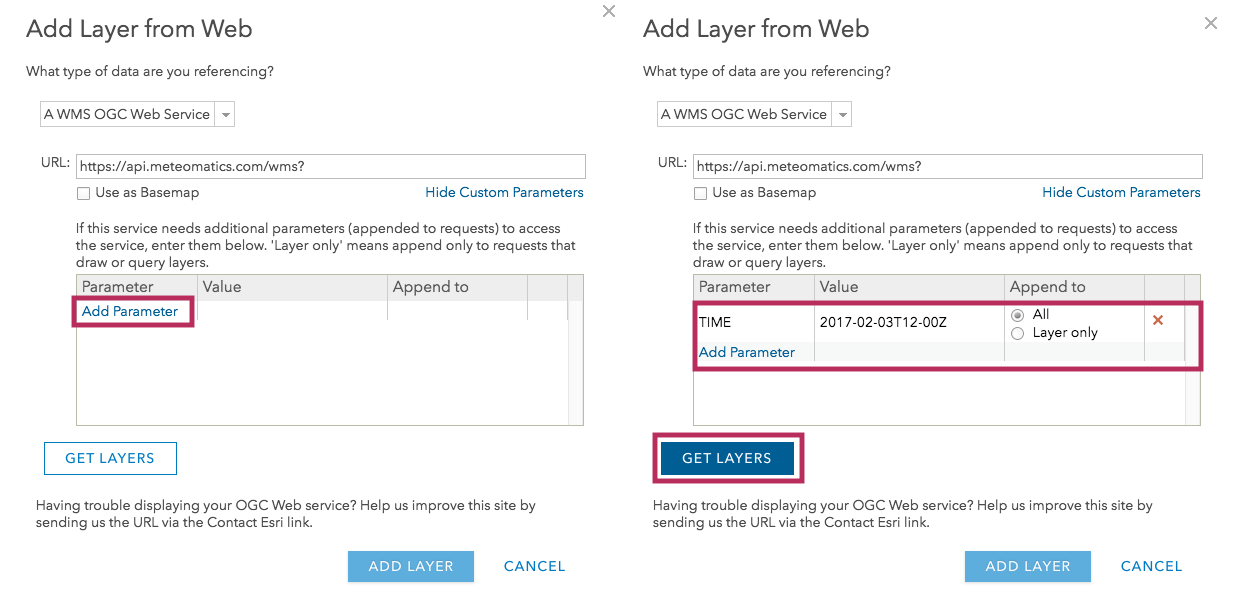
Click on Get Layers, select the layer you're interested in and add it with add layer:

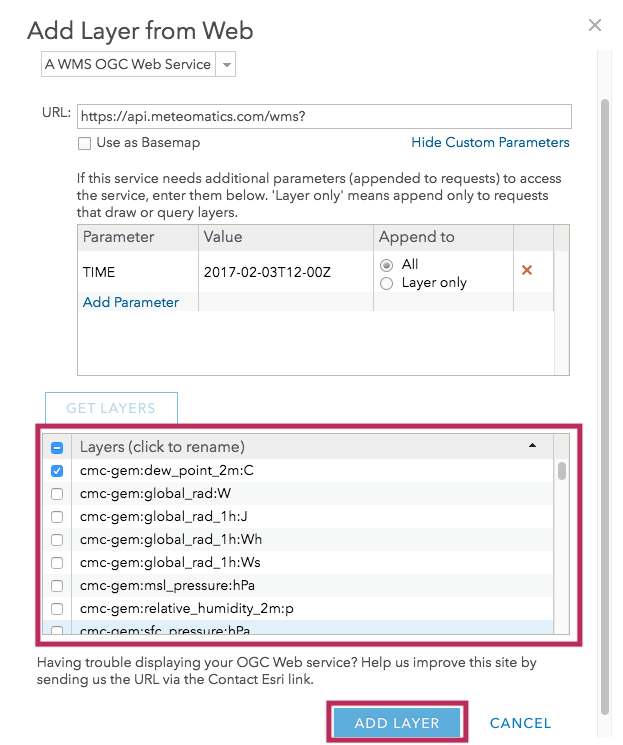
After that you should be able to see the layer (in this case the dew point) with the custom parameters: