QGIS (WMS Instruction)
If you use the free and open source geographic information system QGIS you can follow the instructions below to add our WMS interface to create your own maps.
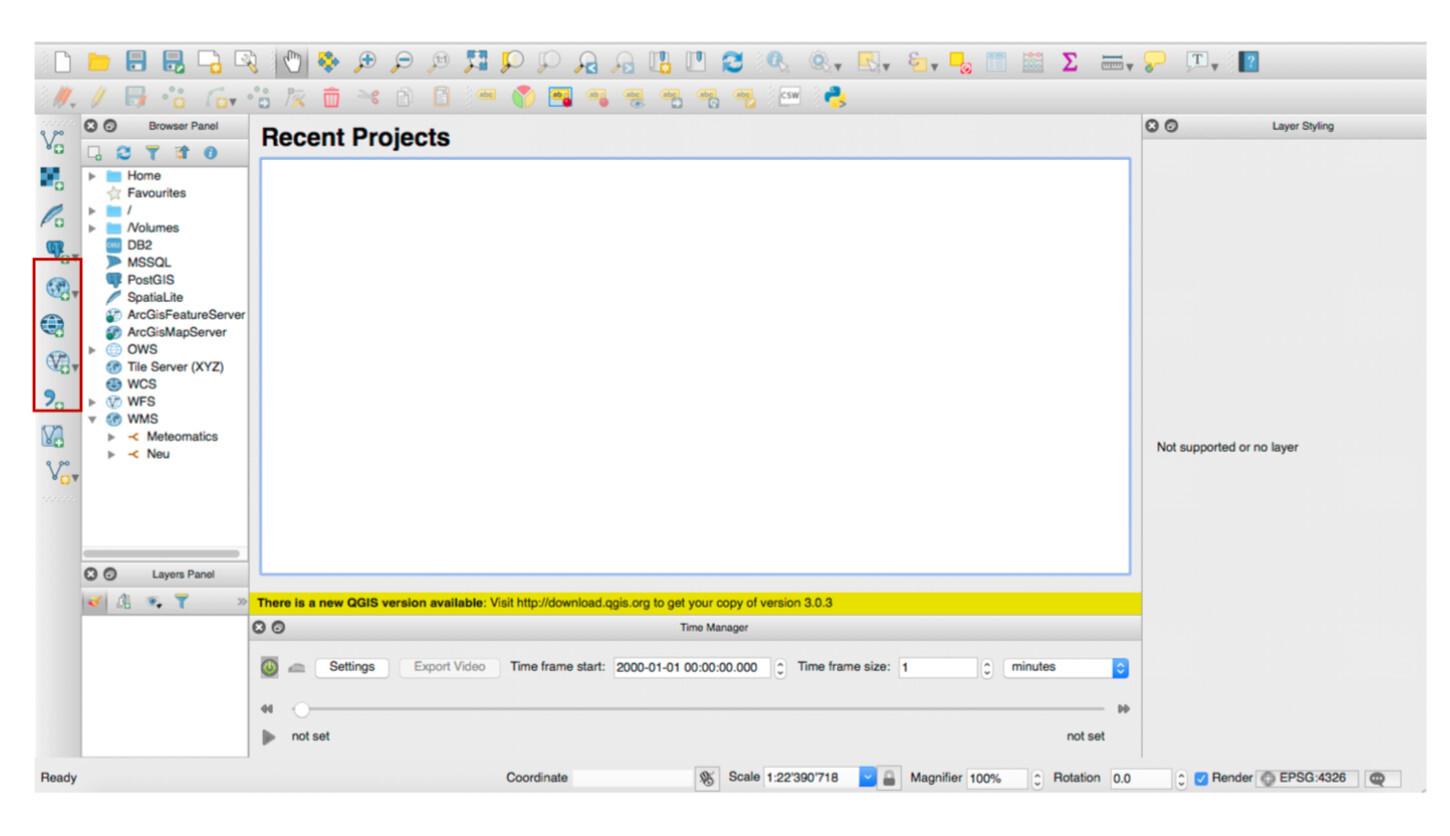
Open QGIS and add a WMS/WMTS-Layer:

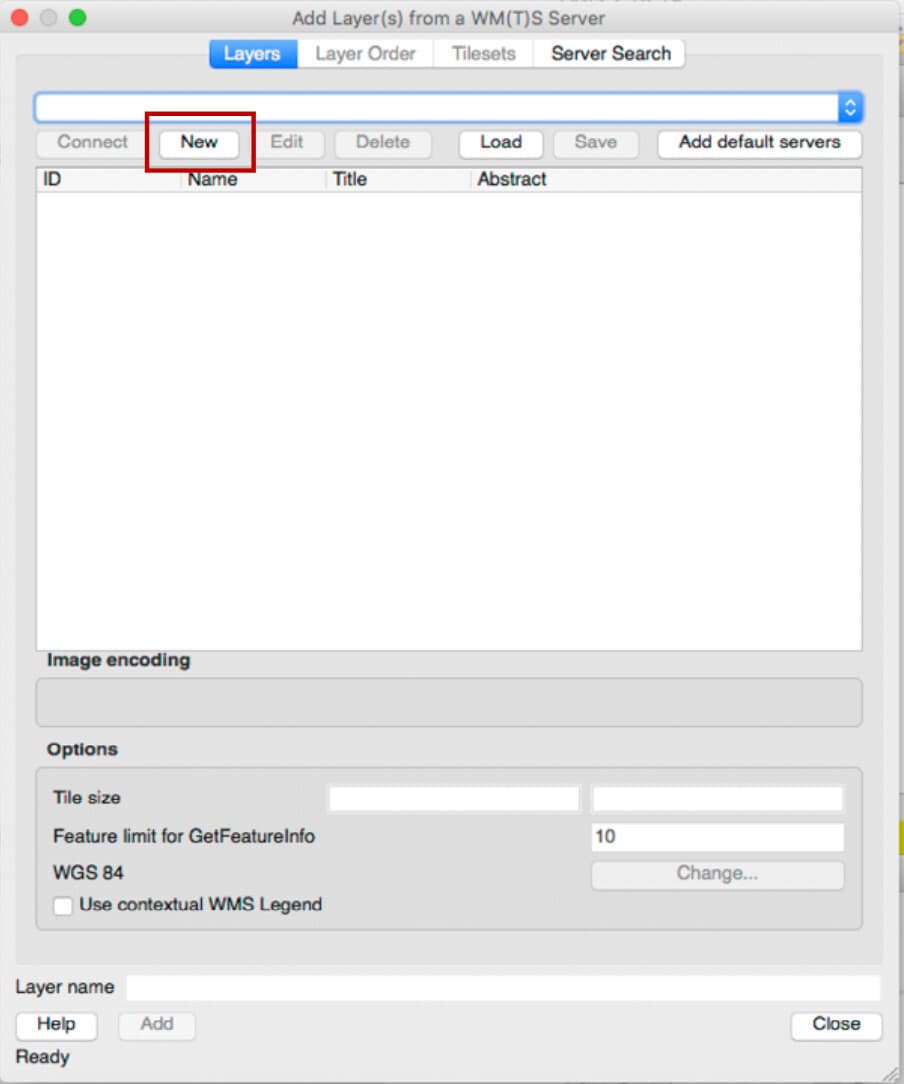
Create a New server connection

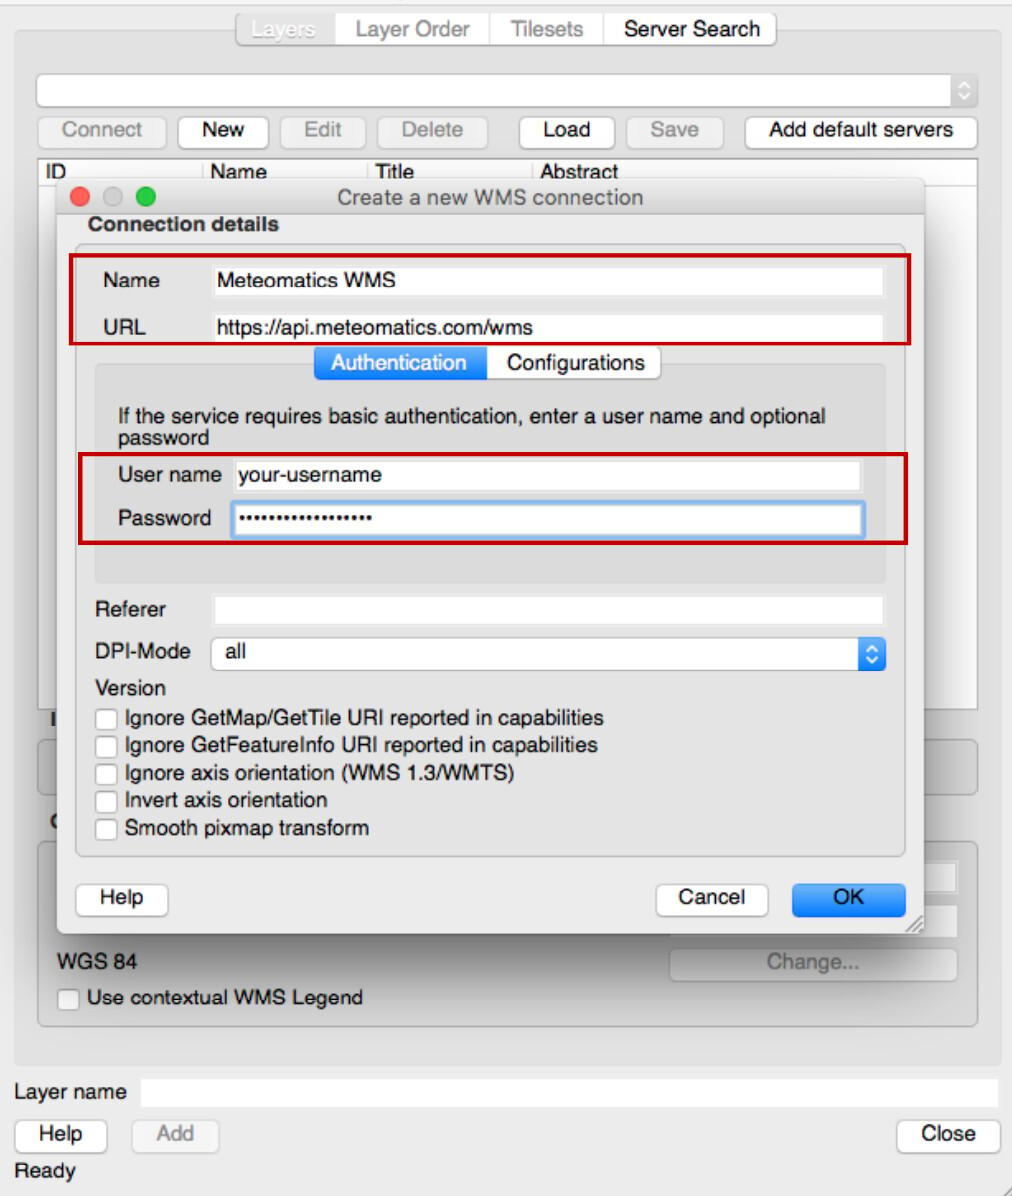
and fill in Name, e.g. with Meteomatics WMS, and URL with our WMS URL http://api.meteomatics.com/wms as well as the user name and password of your Meteomatics API user account.

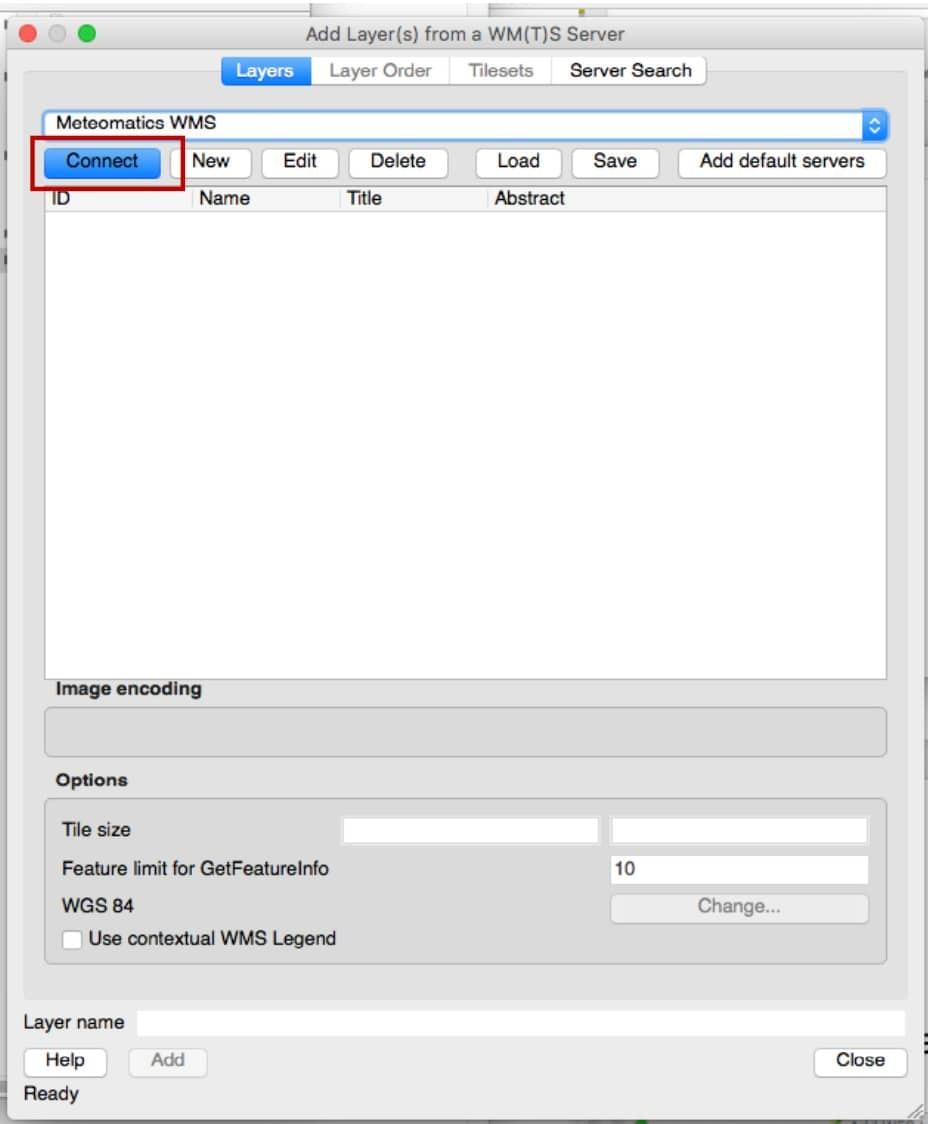
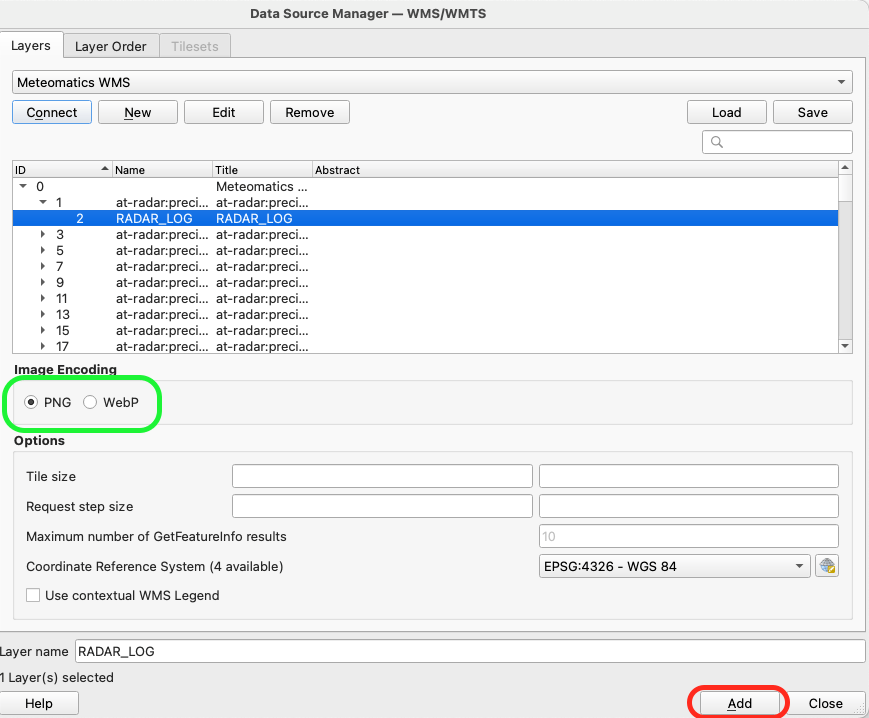
Connect to the Meteomatics WMS with Connect,

select your desired layer and Add it:

This should result in QGIS displaying the desired layer, e.g. that of the dew point:

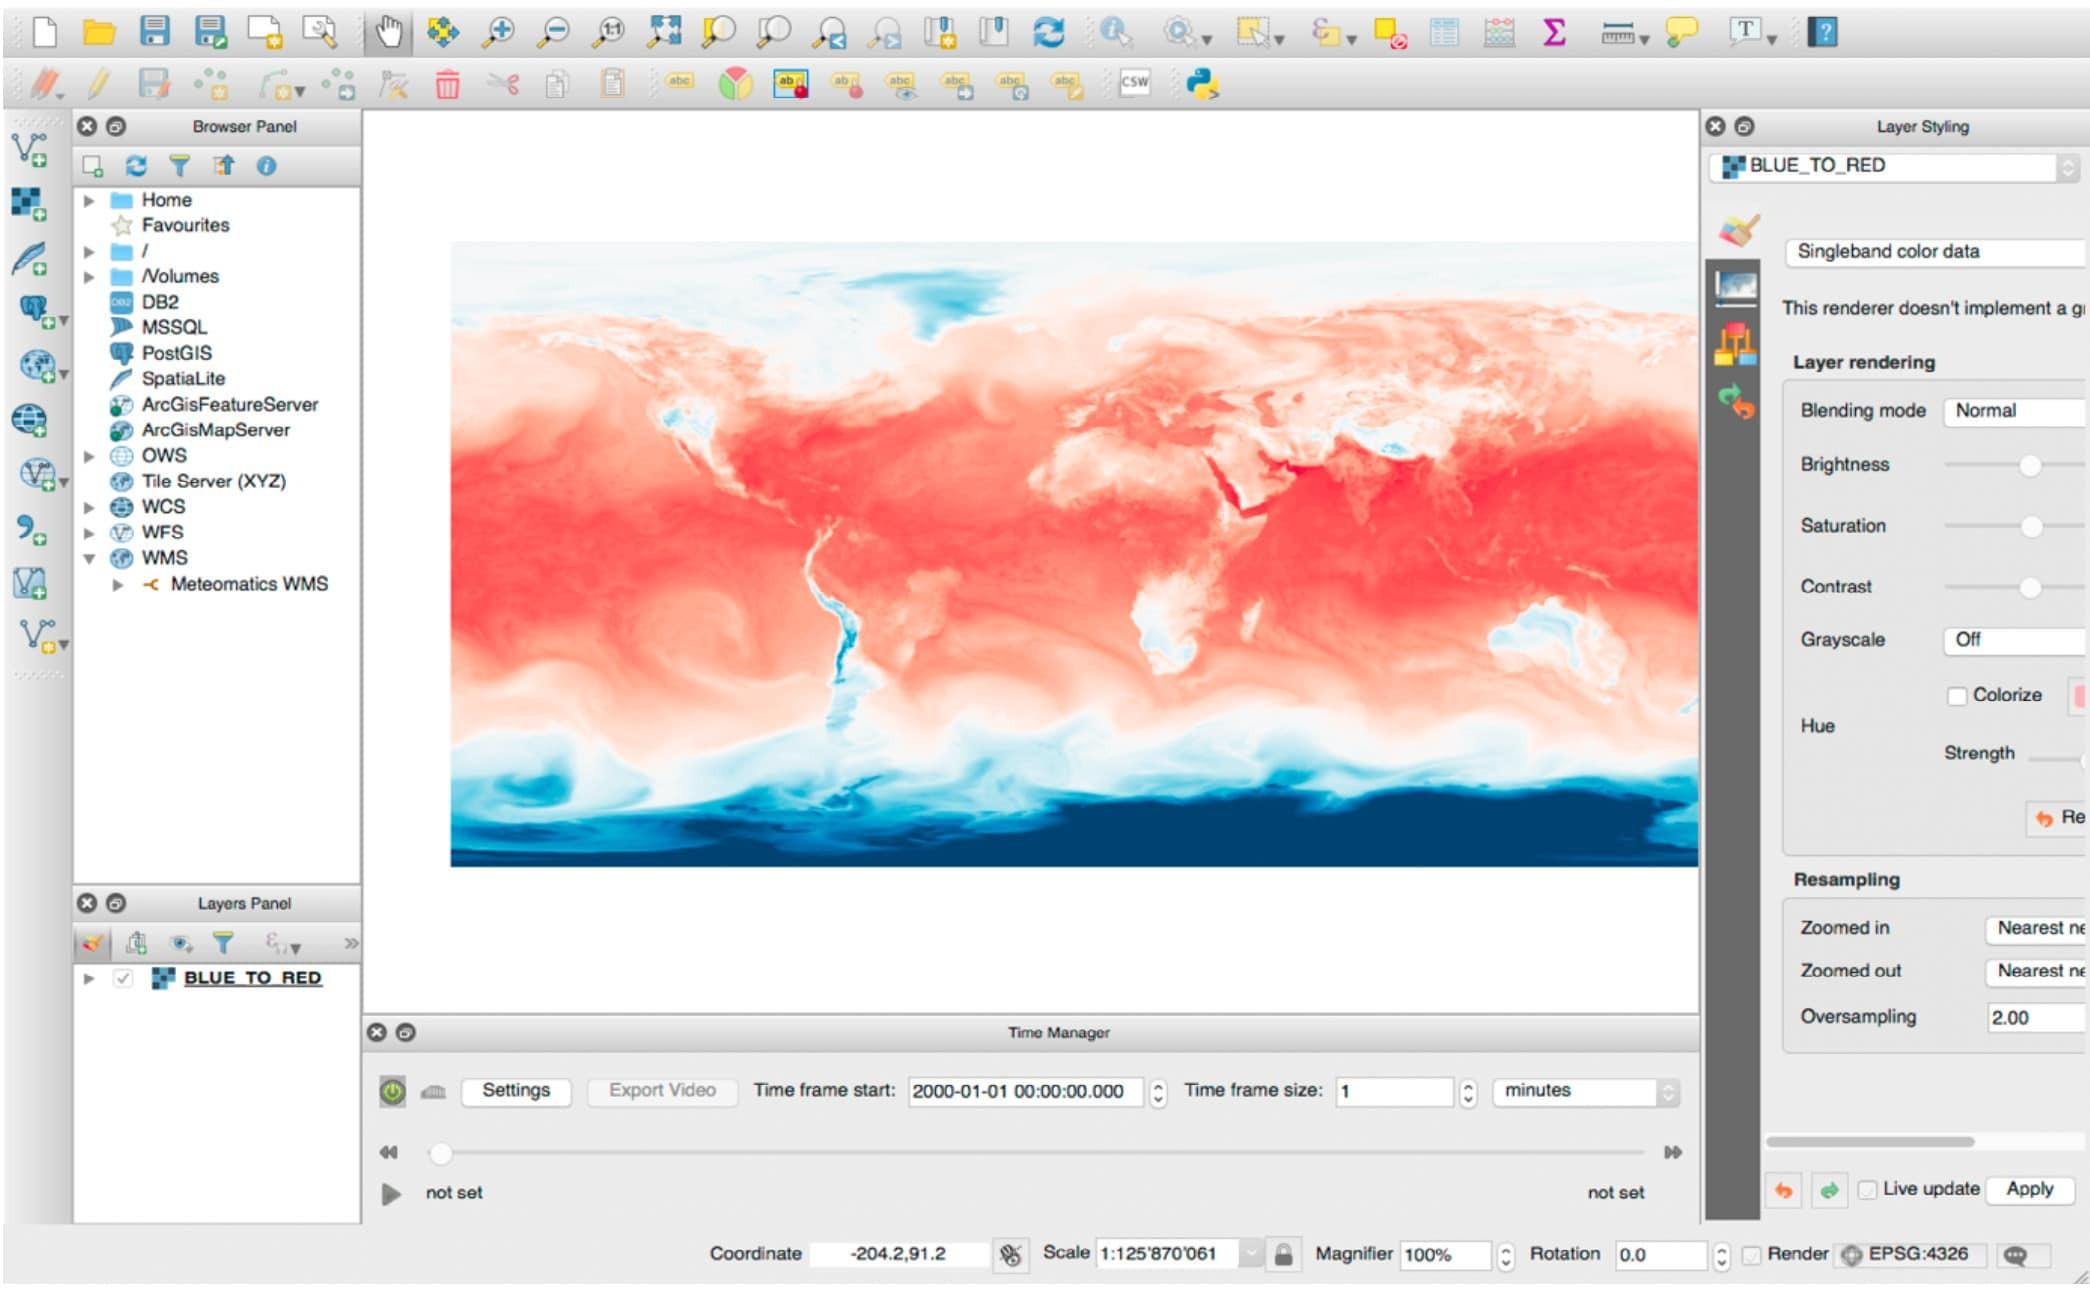
Note: the QGIS plugin TimeManager allows you to easily choose a time (without entering the time, the imagery is taken for the current time) and create slideshows/videos of WMS content.